- 188 North Trade St. Matthews, NC 28105
- 704.847.4088
- Tues-Fri: 8am-4pm | Sat-Mon: CLOSED

One of our biggest passions at Renfrow’s is teaching and cultivating our customers’ backyard gardening skills. Explore our resources on Tomatoes, Asparagus, Irish Seed Potatoes & Onions.
You can also download all of our veggie resources in their full versions at once!
Download All of Our Veggie Guides Now!
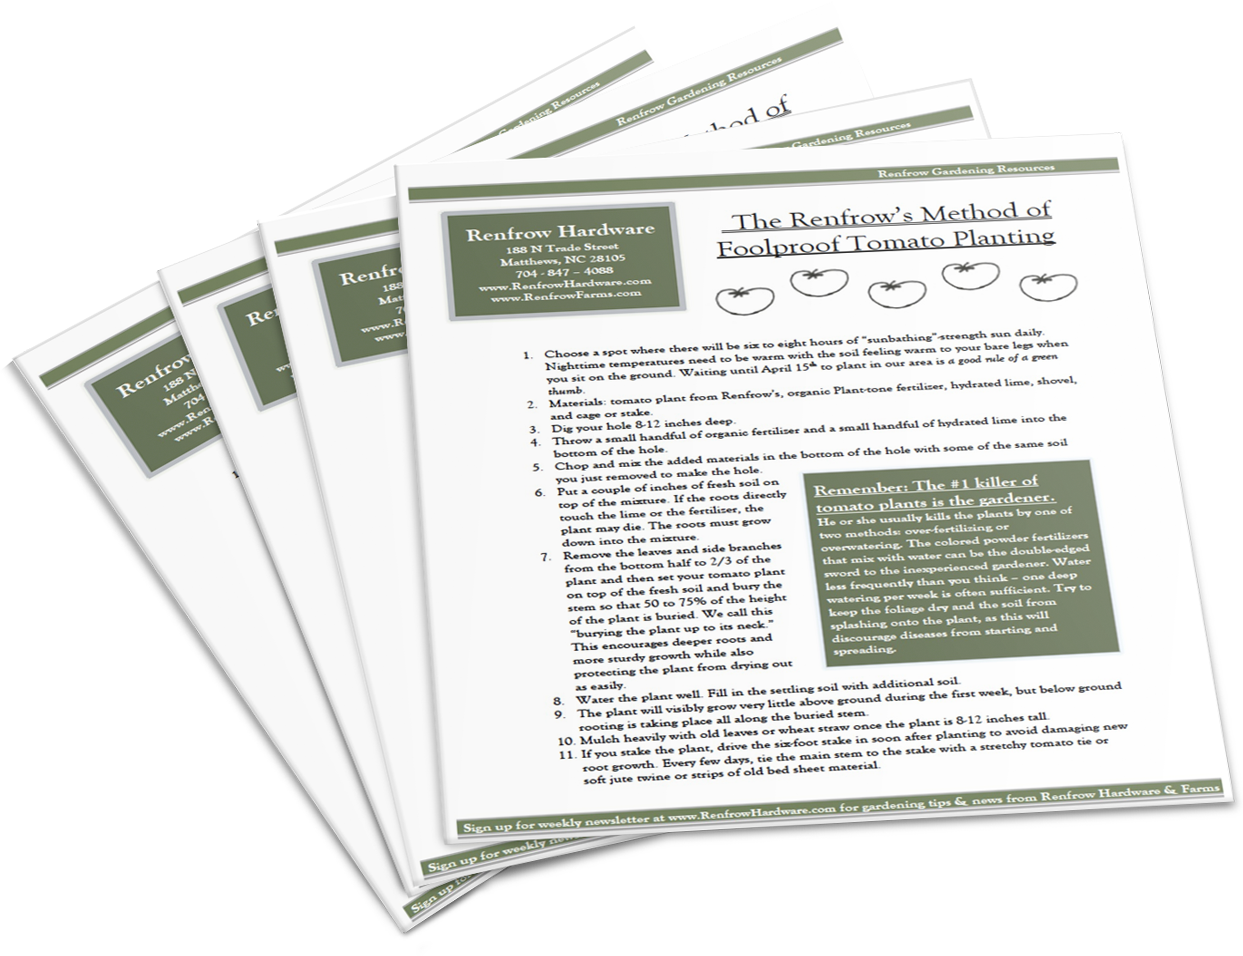
 Ever have issues with plating your tomatoes? Here is our 16 step method for fool proof tomato planting!
1. Choose a spot where there will be six to eight hours of “sunbathing”-strength sun daily. Nighttime temperatures need to be warm with the soil feeling warm to your bare legs when you sit on the ground. Waiting until April 15th to plant in our area is a good rule of a green thumb.
2. Materials: tomato plant from Renfrow’s, organic Plant-tone fertilizer, hydrated lime, shovel, and cage or stake.
3. Dig your hole 8-12 inches deep.
4. Throw a small handful of organic fertilizer and a small handful of hydrated lime into the bottom of the hole.
5. Chop and mix the added materials in the bottom of the hole with some of the same soil you just removed to make the hole.
 6. Put a couple of inches of fresh soil on top of the mixture. If the roots directly touch the lime or the fertilizer, the plant may die. The roots must grow down into the mixture.
7. Remove the leaves and side branches from the bottom half to 2/3 of the plant and then set your tomato plant on top of the fresh soil and bury the stem so that 50 to 75% of the height of the plant is buried. We call this “burying the plant up to its neck.” This encourages deeper roots and more sturdy growth while also protecting the plant from drying out as easily.
8. Water the plant well. Fill in the settling soil with additional soil.
For steps 9 through 16 download our full Tomato Guide to have handy for next time your planting! You will also gain access to all of our other fruit resource guides!
Fresh, homegrown asparagus tastes about a zillion times better than its grocery store counterpart.
 Asparagus is the queen of garden vegetables, requiring more weeding and pampering than most members of your backyard food supply, but we think that you will find that the challenge reaps delicious rewards.
After arriving in late January, we sell our Jersey Knight asparagus in bundles of 20-25 “crowns” until we run out. The ideal timeframe for planting is Feb-Mar.
Renfrow’s has the variety Jersey Giant available in bundles of 20 to 25 crowns. One to two bundles is usually enough for a family, but if you have multiple avid asparagus eaters, you may want to expand your patch as large as you can spare! The crowns arrive in late January or early February for mid-winter planting. They are two-year-old crowns that will need another two or three years after planting to grow before you should begin harvesting. We advise that you grow these only if you are in a long-term garden plot due to the time and commitment necessary for this vegetable.
Asparagus crowns need to be planted in your sunniest, richest soil; plan on the bed being there for 25 to 50 years. Dig your bed as deeply as you reasonably can and mix in lots of organic matter (what garden plant doesn’t ask for that?). Space your crowns 2 – 2 ½ feet apart and bury about 2 inches deep.
Download our full guide to learn more about what conditions to grow your asparagus in, caring for your asparagus plant and harvesting. You will also gain access to all of our other veggie resources!
 Harvesting your first patch of home grown potatoes is one of the most gratifying experiences in the gardening world because you get to dig up big, beautiful tubers that you were not able to see during the entire growing process. This makes every potato a sweet surprise! The flavor of homegrown potatoes will surpass those that are store-bought every single time.
Always use certified seed potatoes because they need to be tested and certified as disease-free. Grocery store potatoes and potatoes saved from your previous year’s harvest are not tested. Plant your potatoes in a new spot each year to help break any disease cycles that may occur. Potatoes are in the nightshade family, along with tomatoes, peppers, and eggplant, so rotate all of these crops as much as possible.
 How to plant and hill potatoes
Cut your large seed potatoes so that there is at least one “eye” or bud on each piece, typically in 4-5 pieces. Or select small potatoes and plant them whole. Allow several hours, or up to 3 days, to pass between slicing and planting your seed. You want to allow time for the fresh cut to “scab over” which will help prevent potential rot issues after planting.
Download our full guide to learn more about potato’s watering needs, when it’s time to pull up your potato crop and how to store fresh potatoes. You will also gain access to all of our other veggie resources!
Throughout the year, Renfrow’s carries several kinds of alliums that you can easily grow in your backyard for fresh eating.
 Onion sets are small immature onion bulbs that continue growing when you plant them. They come in yellow, white, and red. Yellow sets tend to be the best keepers and white sets tend to be the mildest. Sets never get much bigger than a golf ball, but make great “scallion” or “green” or “spring” onions. You can eat both the bulb and the green tops. They benefit from planting 1-2 inches deep in a “trench” row that can later be hoed up to create a long “shank” on the onion. Harvest at any stage; older ones may require a little loosening of the surrounding soil with a fork or shovel to get the whole onion up. Break off the seed heads, and use as a garnish in soups or salads, if they form on top. Plant onion sets from mid-October to mid-April to spread out the harvest. They do not grow well in the summer. Space about 3 inches apart in rows or squares. One pound plants 15-25 feet. Fertilize with organic Plant-tone or Garden-tone.
 Onion plants are starts of the hybrid onions that go by various names as Georgia Sweets or Texas Sweets. The particular variety we carry is Granex Hybrid and they come in yellow, white, and red. These onions grow larger than sets. These are field-grown from seed by large farms until they reach a certain size, are harvested as little plants, and bundled bare-root for shipping to us for you to transplant. Consequently, availability is subject to all of nature’s variations in temperature and moisture. These are not available on a precise schedule and we cannot predict when they will arrive each season.
 For proper development of large bulbs, these need to be planted high. Your rows should be more like a speed bump than like a trench (different than sets). Soak the bottom inch of the plant bundle in a pail of water for a few minutes before planting to rehydrate the roots. Space them 6” apart if you desire big onions. Plant them in the fall or early spring to allow for lots of growth time. Break off seed heads that form on top. They all need to be harvested when about 1/2 to 1/3 of the tops begin to flop over, usually in May. Eat them quickly as they do not store very well. There is an art to correctly drying onions. We can give you some tips. If you desire green scallion onions, onion plants are an excellent choice. Plant them deeper in a trench row and more closely follow the “sets” culture explained earlier.
Download our full guide to learn more about how to plant challenging onion seeds, multiplier onions, shallots, garlic and leeks. You will also gain access to all of our other veggie resources!
